Help

DITTO help

How to build a 3D tour of your product, put it on your website and manage it afterwards.

Before you start

DITTO turns a 3D model of your product into a clickable tour for your website. We call the result a twin.

You need a 3D model as a GLB file (glTF binary), 25 MB or smaller. Most 3D and CAD tools can export GLB. If yours cannot, write to us (see Get help).

Building is free. You do not need an account until you are ready to publish. When you publish, you create an account, pay by card, and the twin goes live.

Your work saves as you go, so you can close the page and come back.

Build your twin in eight steps

The steps run along the top of the builder. You can click any step at any time. Each step has two tabs: Simple holds the choices most people need, Advanced holds the rest. You never need Advanced to finish.

Step 1: Model

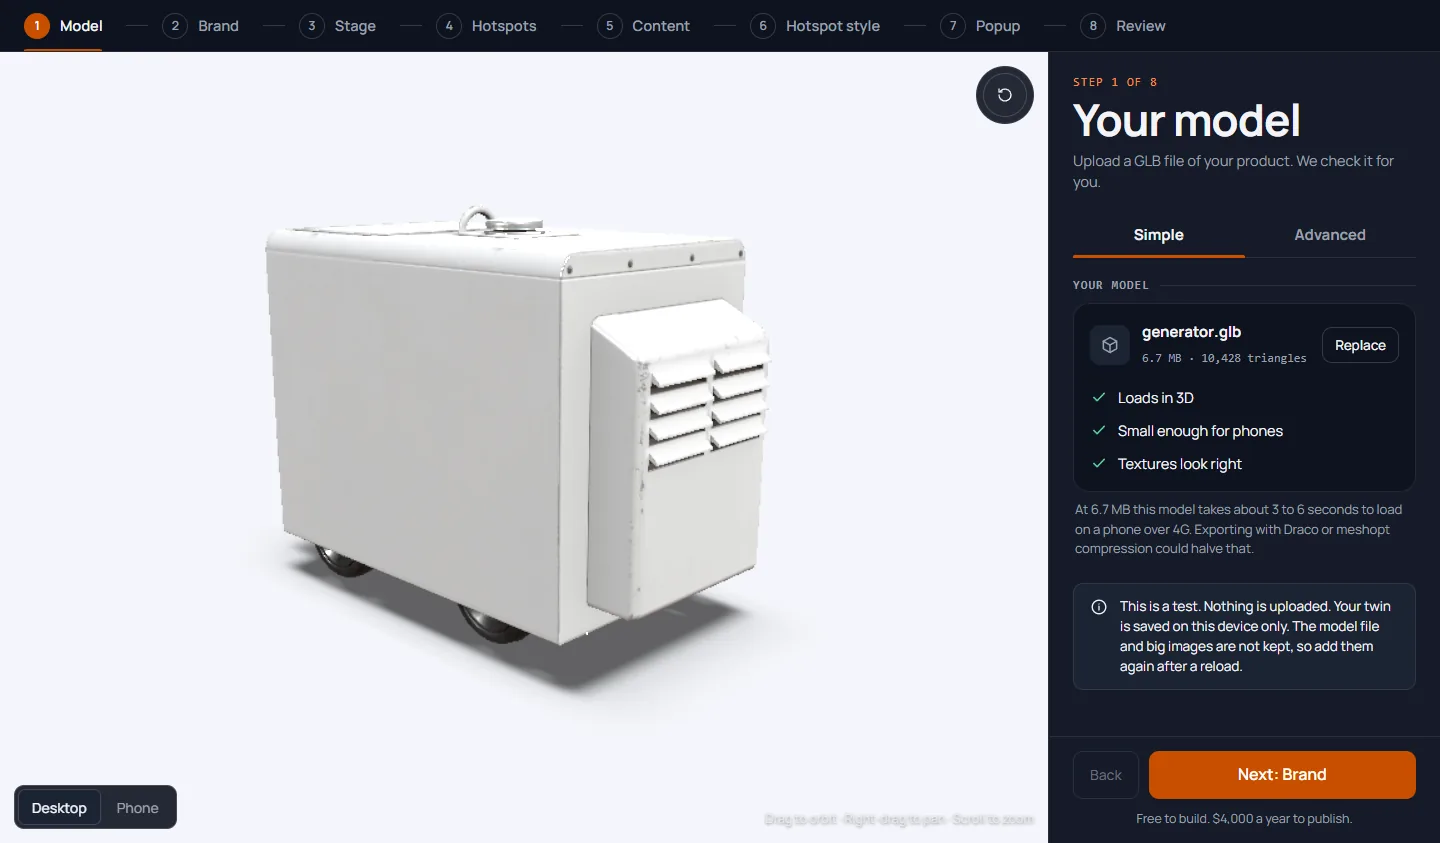
Drag your GLB file in, or pick it from your computer. DITTO checks the file in your browser and again on our servers, and shows a short report: file size, triangle count, number of textures and materials, and any warnings.

If a warning says the model is heavy, such as very large textures, follow its advice. DITTO scales large textures down for phones. If the file is over 25 MB, simplify it in your 3D tool or export it with lower quality textures, then upload again.

Replace puts a different file in the same twin. Check the hotspots afterward if the new model has a different shape.

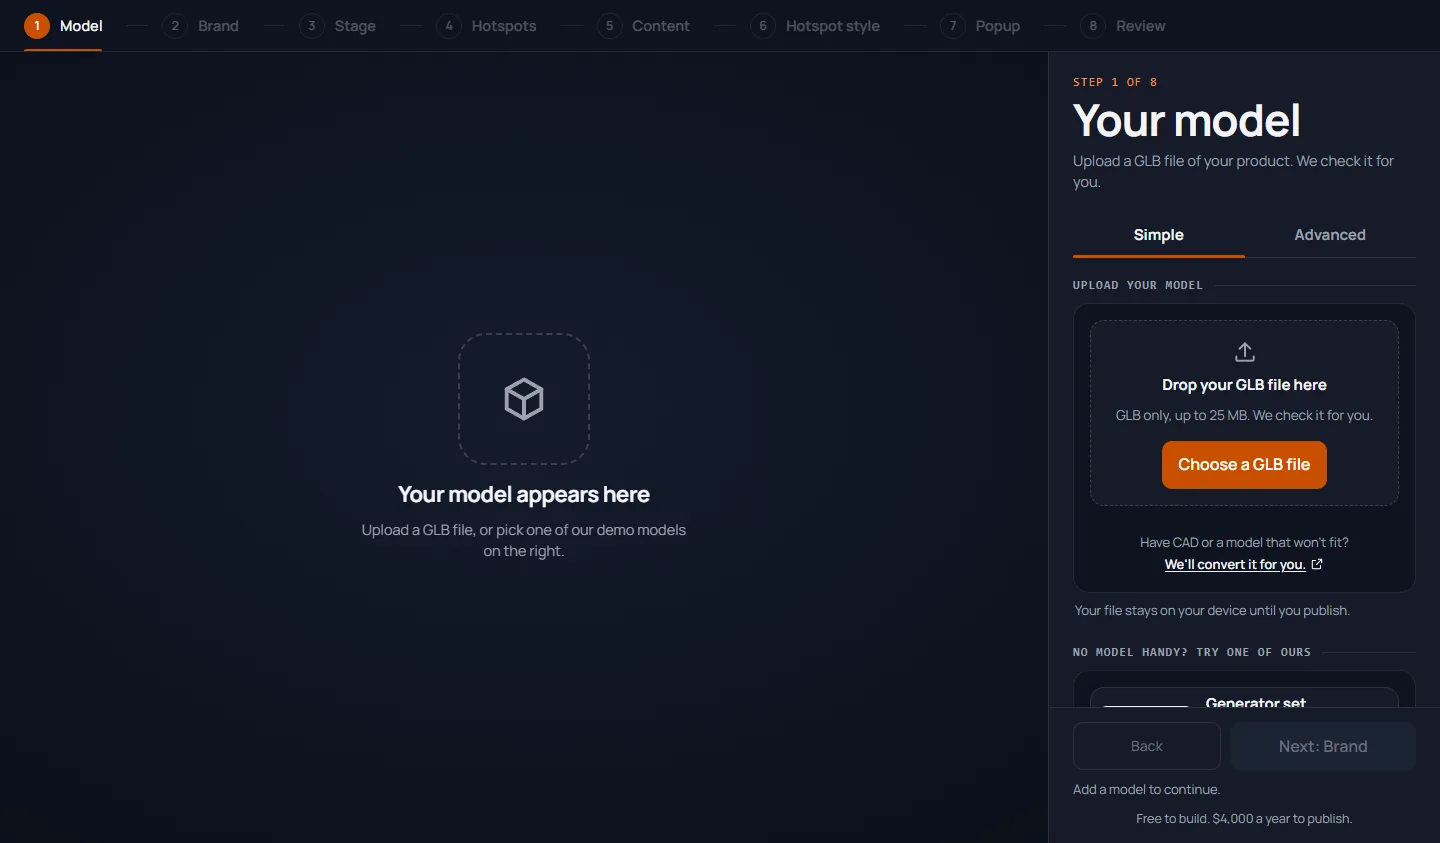
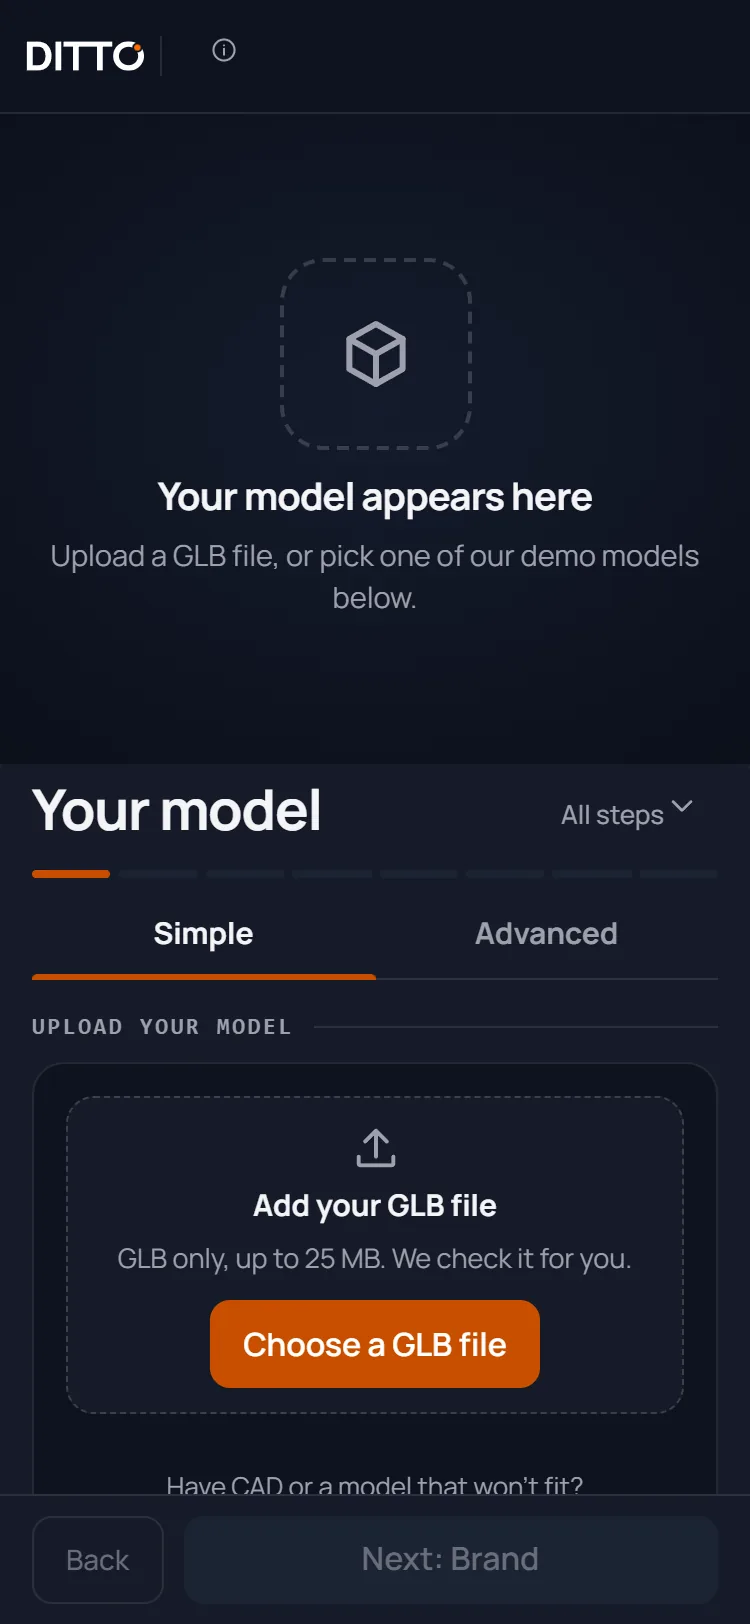
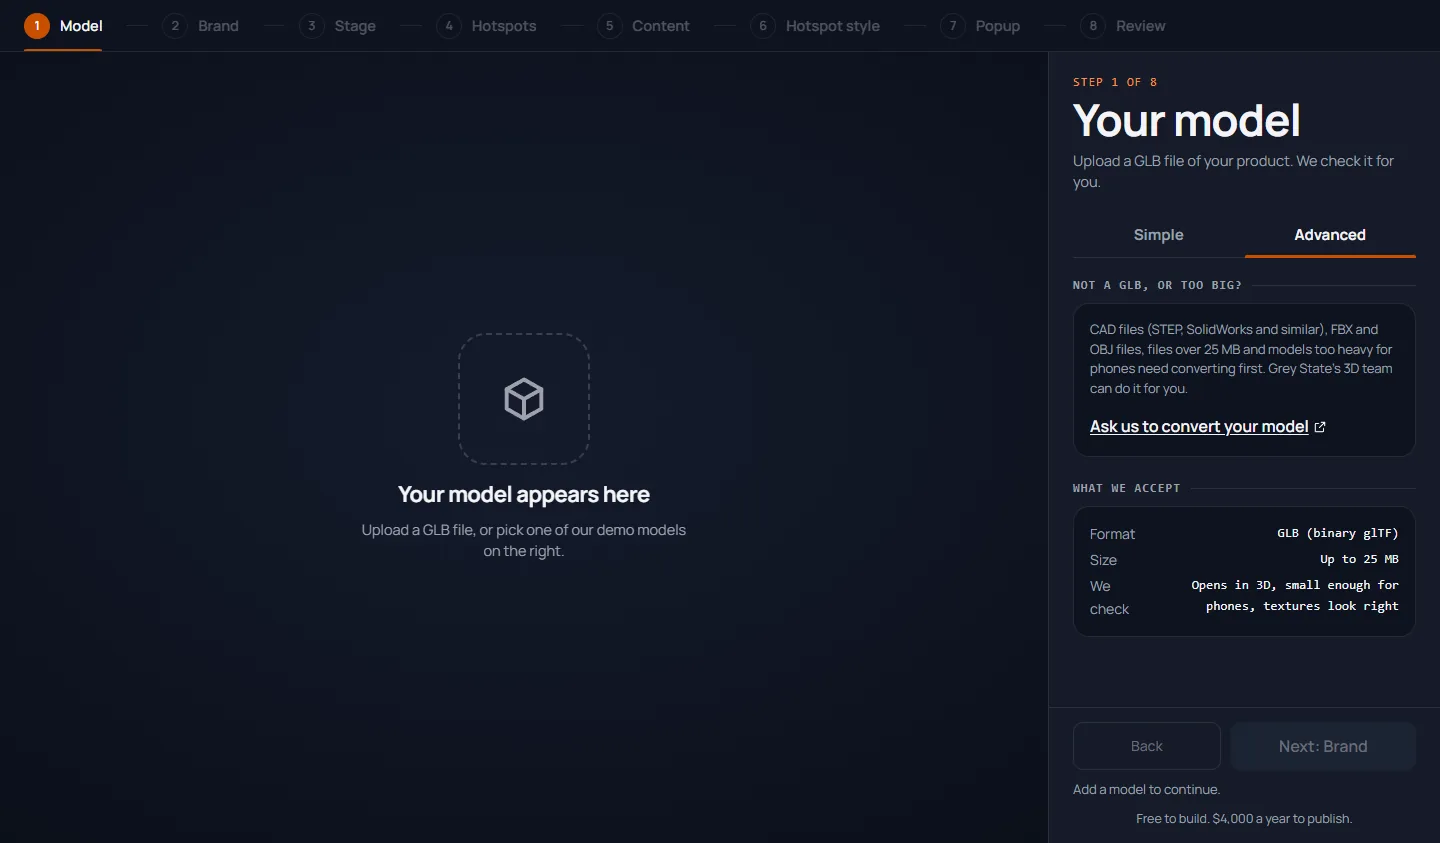
The Model step with nothing uploaded: a drop zone with Choose a GLB file, the line Have CAD or a model that won't fit? We'll convert it for you, and demo models below.
The Model step after uploading a generator: the model in 3D, the file name and size, and three green checks: Loads in 3D, Small enough for phones, Textures look right.
The Model step, Advanced tab, with the model report and warnings.
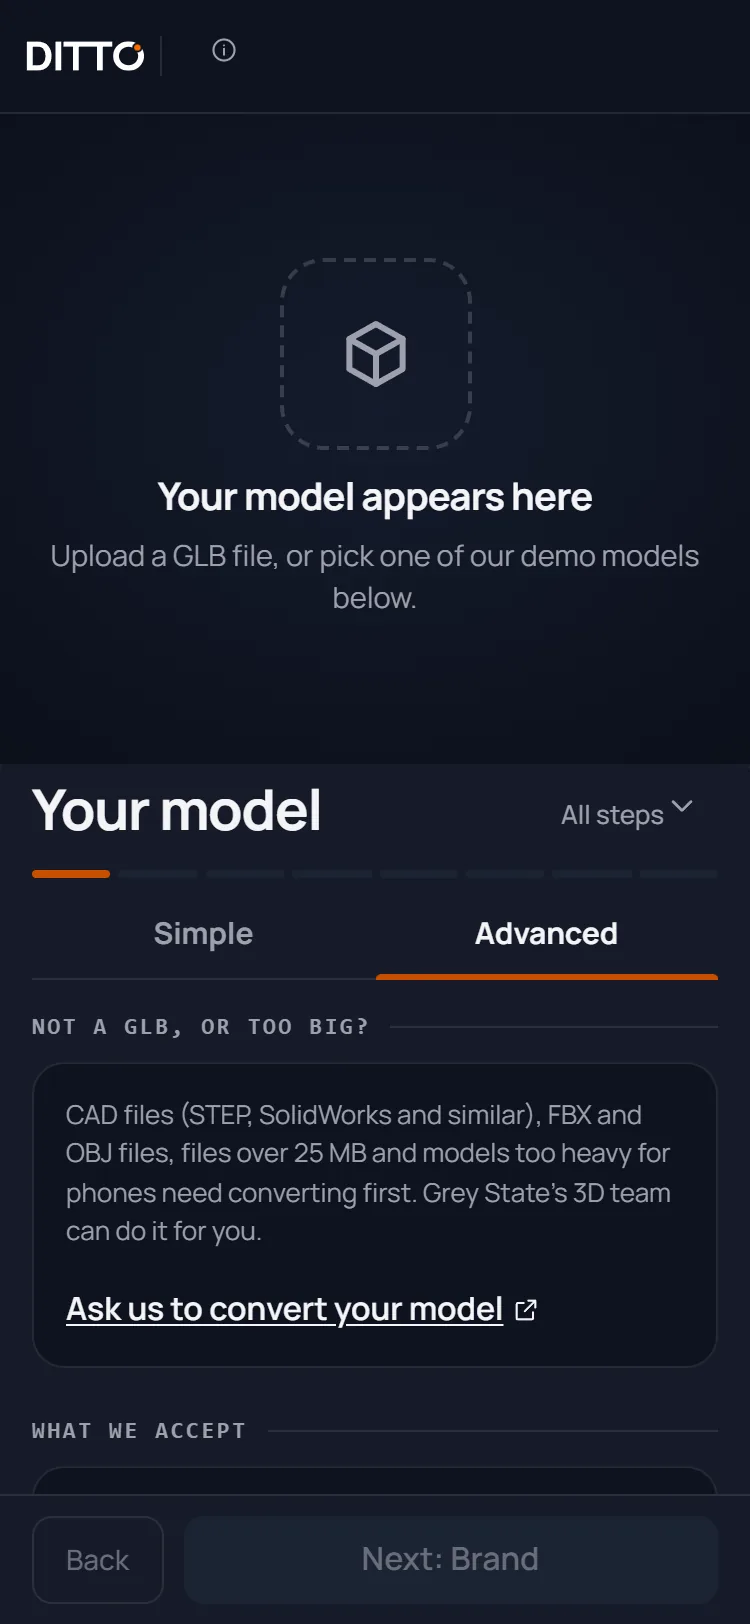
The Model step, Advanced tab, with the block Not a GLB, or too big? explaining that Grey State can convert CAD, FBX, OBJ and large files, with a link.
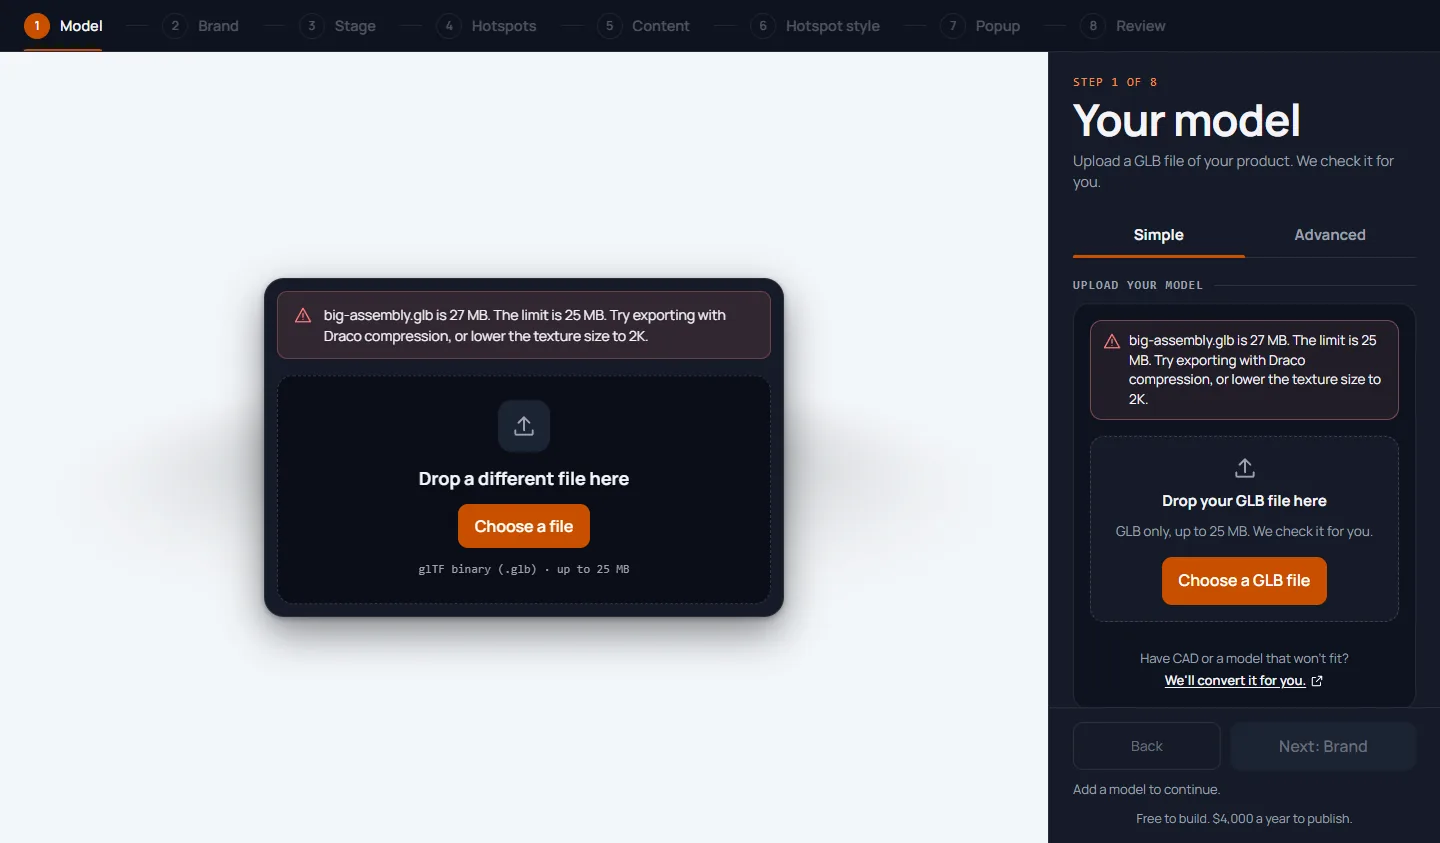
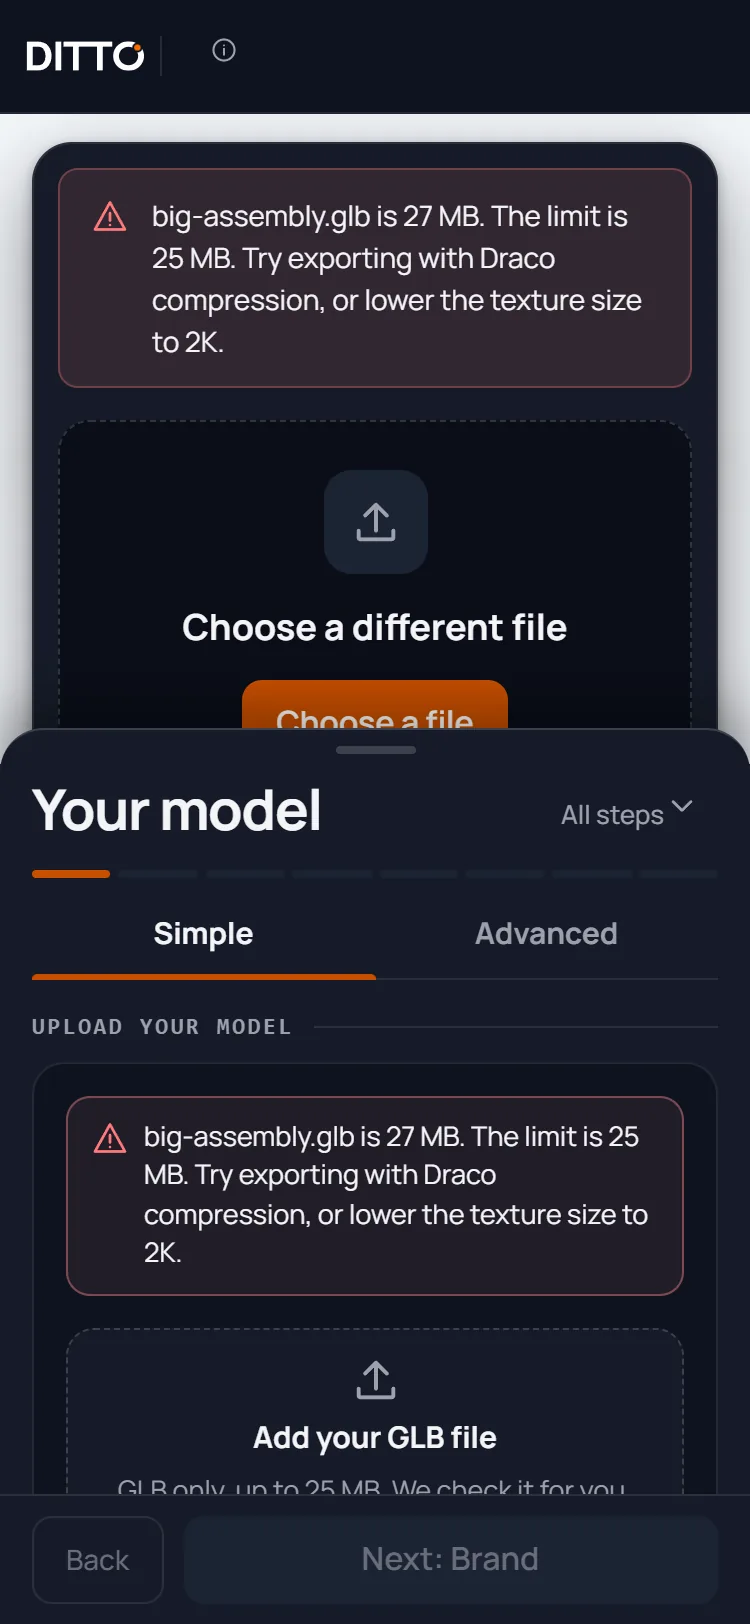
A message that the file is over the 25 MB limit, with a drop zone to choose a different file.
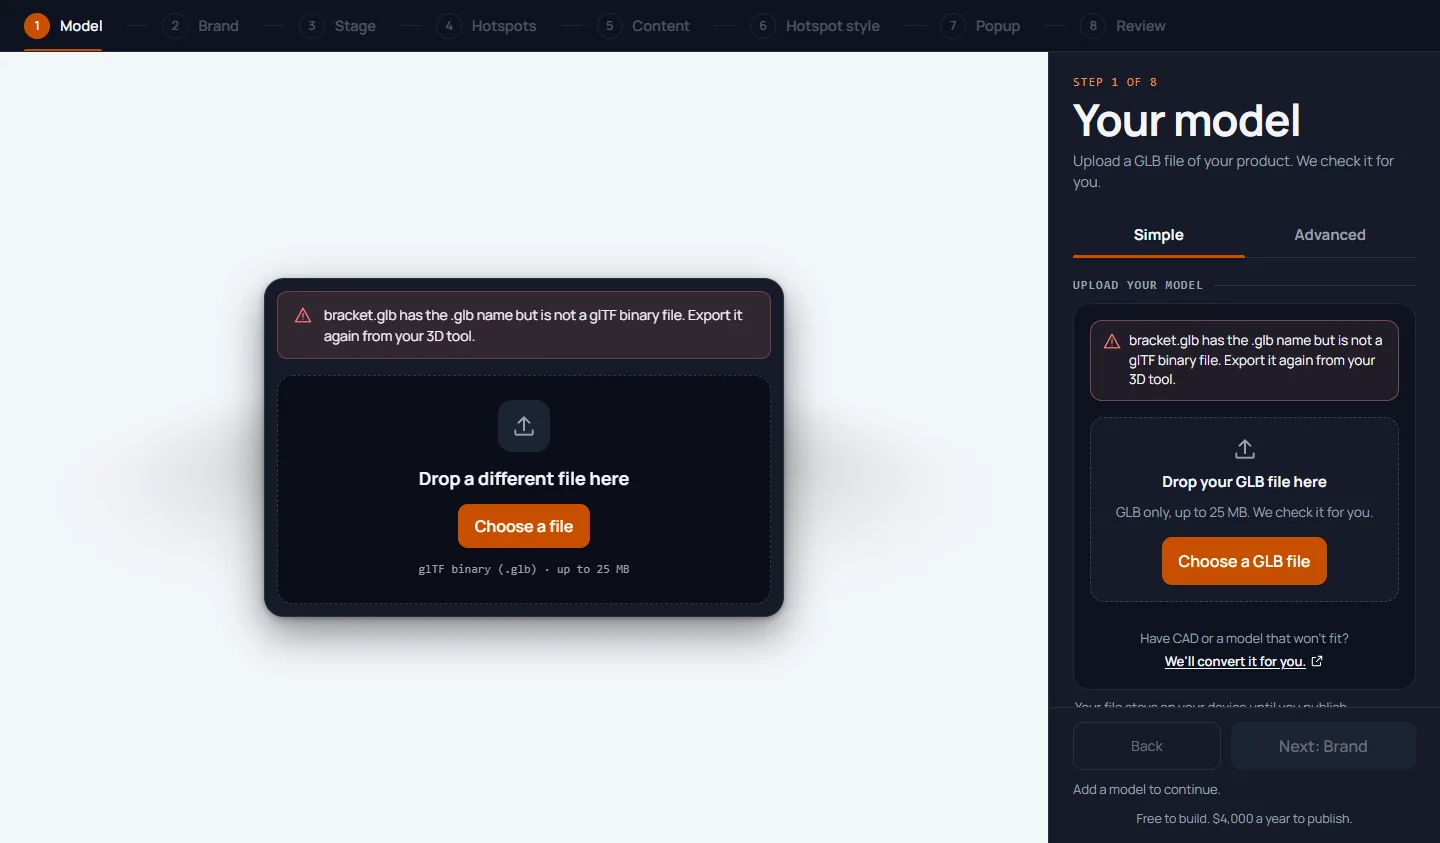
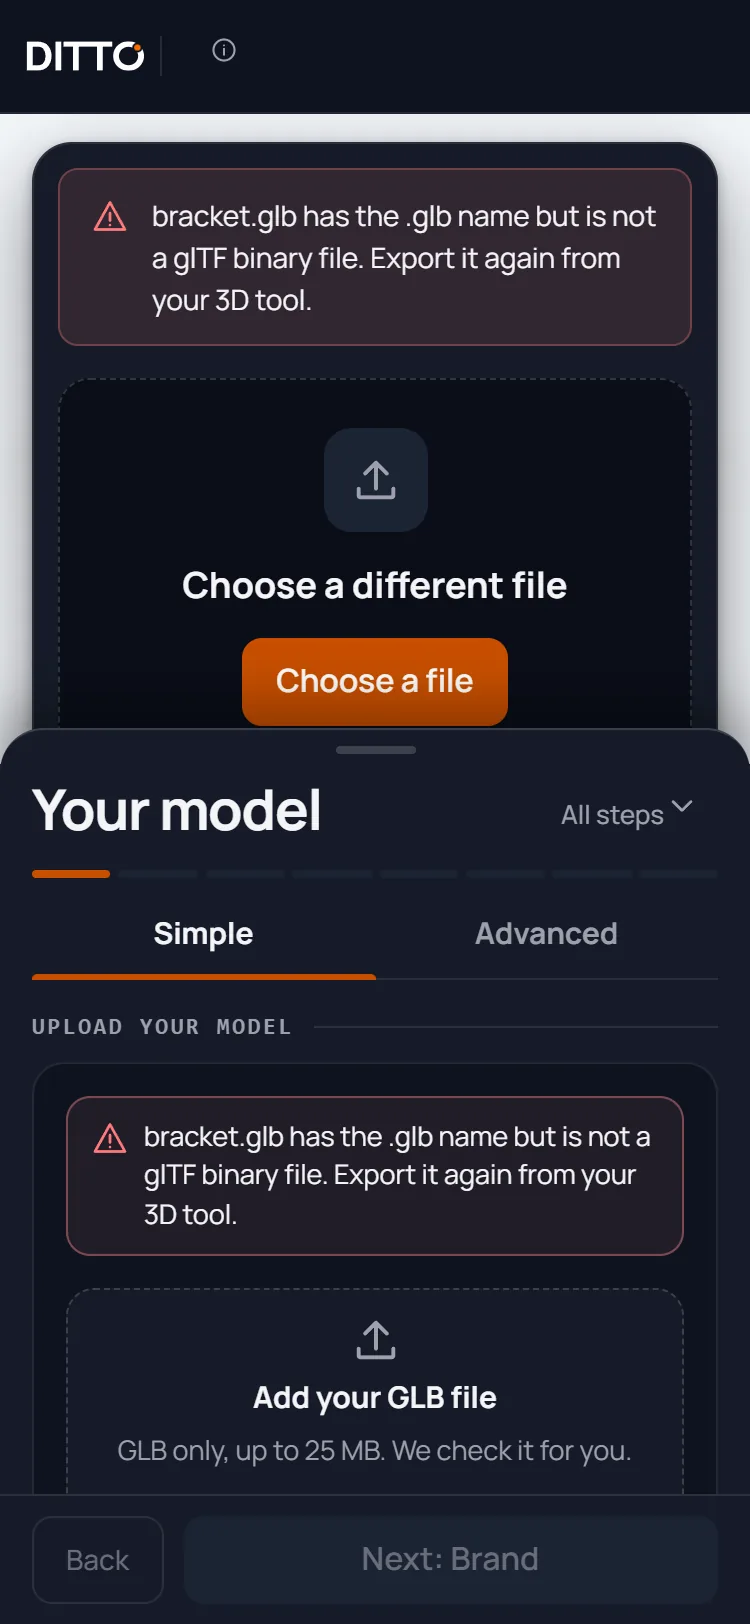
A message that the file has the .glb name but is not a glTF binary file, with a drop zone to choose a different file.

Step 2: Brand

Set what visitors see around the product.

Simple:

  • Brand name: up to 40 characters. It shows next to your logo, or alone if you have no logo.
  • Logo: PNG or JPG, up to 2 MB.
  • Brand color: pick one of the six suggestions or choose your own. A short line tells you if text on that color is hard to read.
  • Popup theme: Light or Dark.
  • Corners: how round the popup and buttons are, from square to rounded.

Advanced: start from one of five themes, set a separate accent color, choose heading and body fonts from Google Fonts, and switch the “Powered by DITTO” credit on or off. The credit is on by default and you can switch it off at no charge.

Until you visit this step, the preview uses a neutral black-and-white look so no color is chosen for you.

The Brand step with a brand name, a logo placeholder and six colour choices, and the brand name over the 3D view.
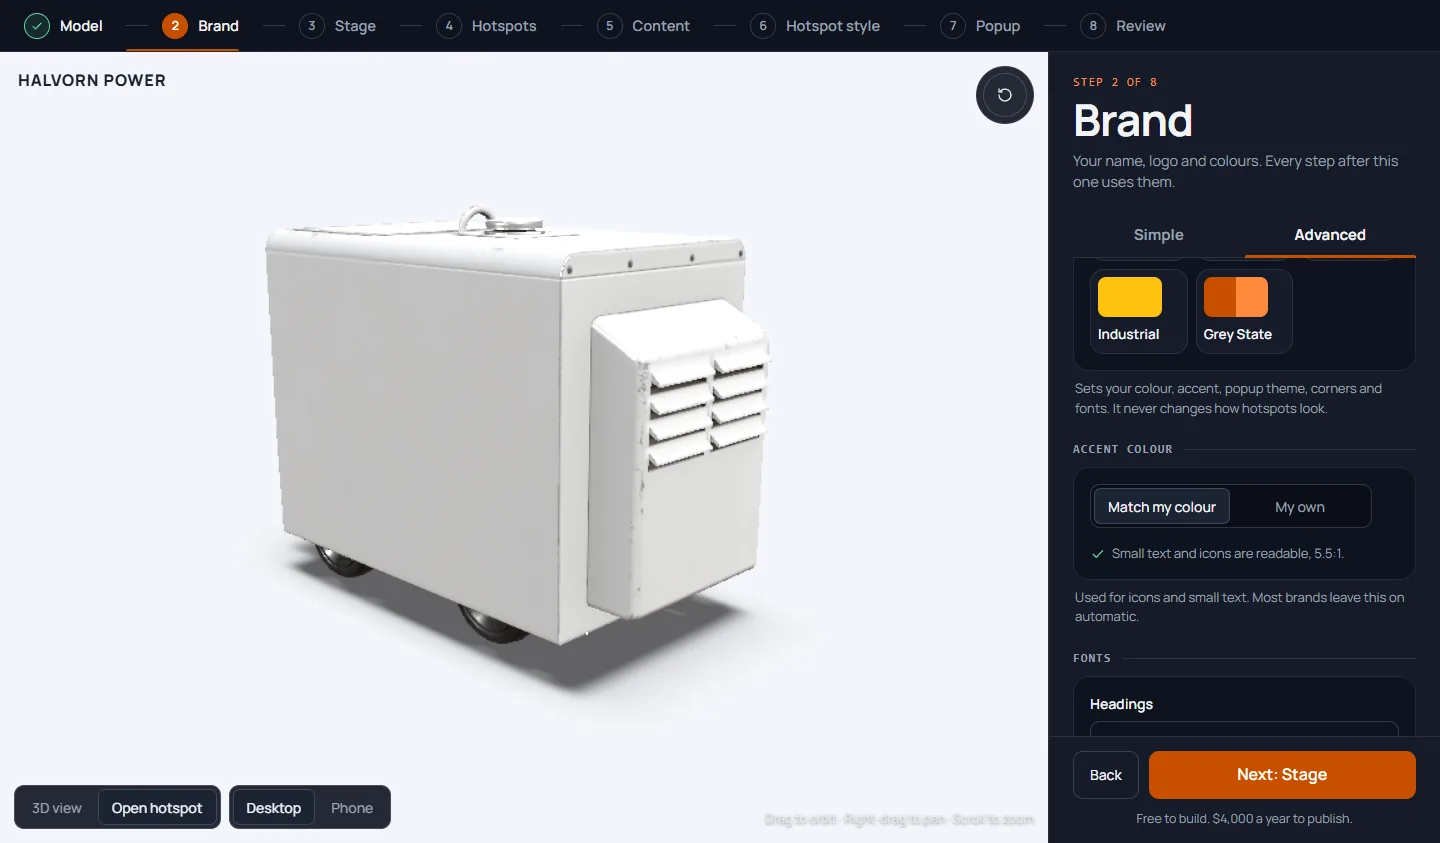
The Brand step, Advanced tab: themes, accent colour, fonts and the credit switch.

Step 3: Stage

Choose what the product stands in front of.

Simple:

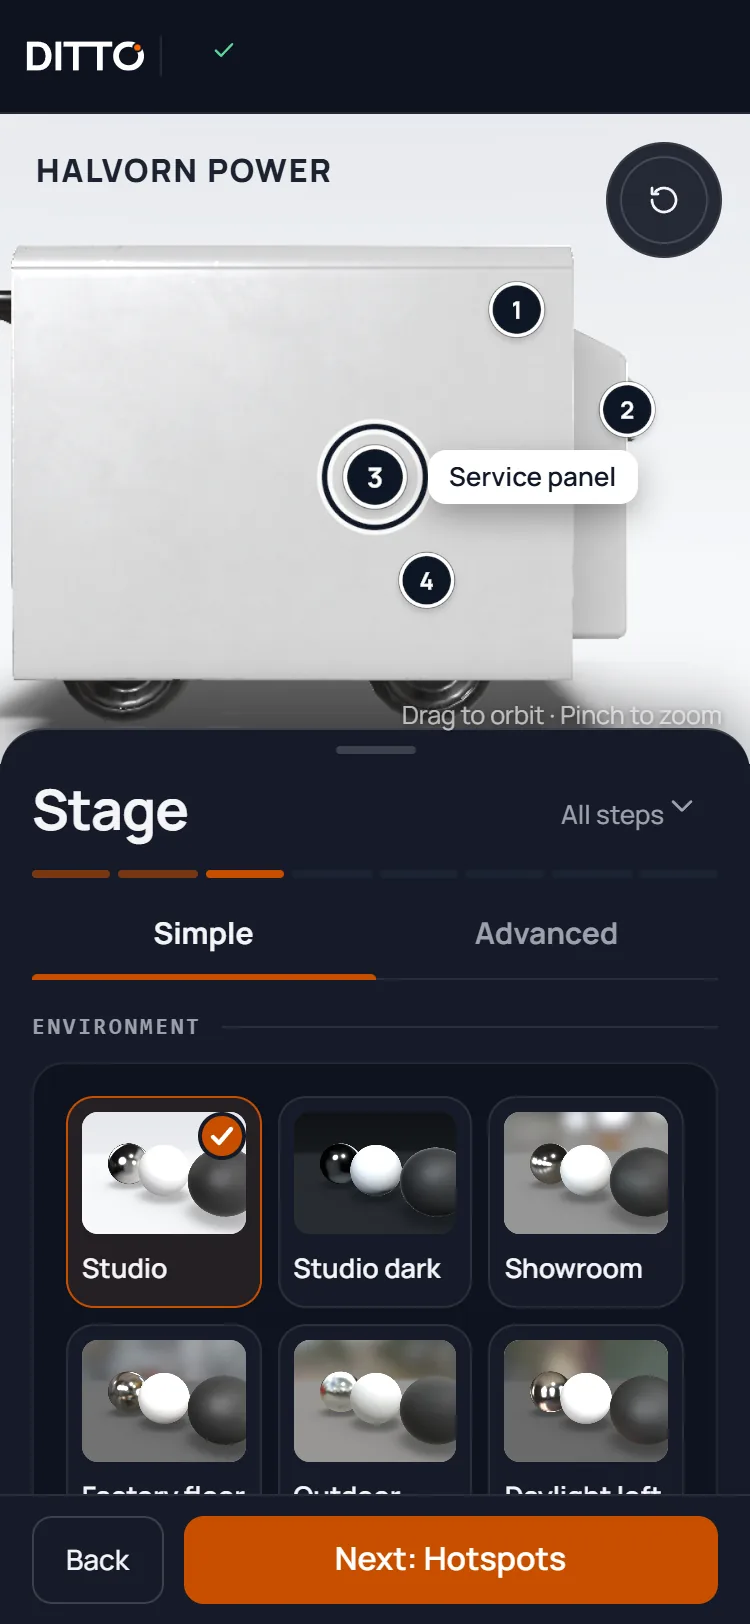
  • Environment: six ready-made rooms (Studio, Studio dark, Showroom, Factory floor, Outdoor yard, Daylight loft) or a plain color.
  • Background: the room’s own, a color, or your own image (JPG or PNG, up to 5 MB).
  • Start view: orbit and zoom to the angle you want visitors to see first, then press “Use the current view”.

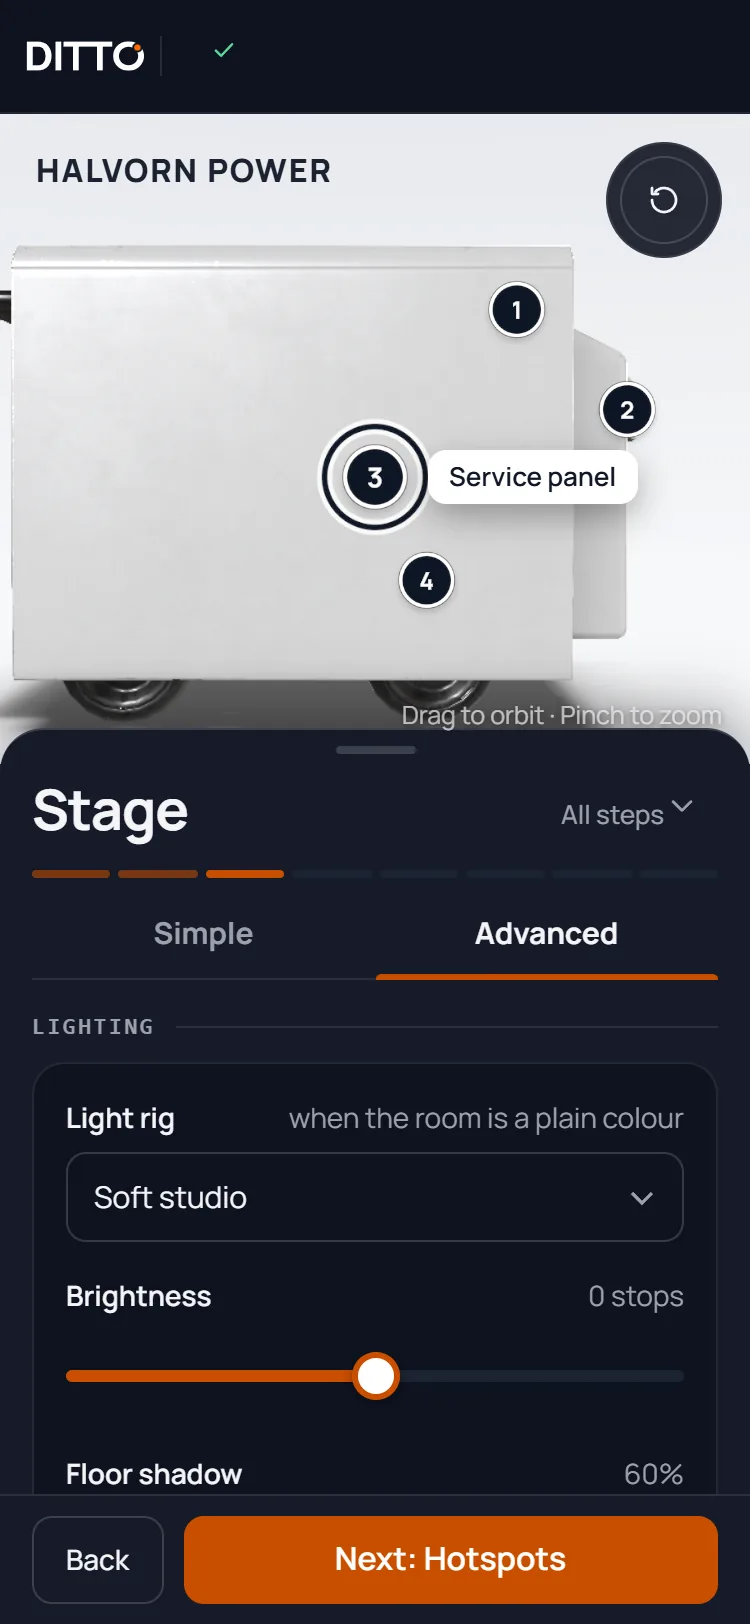
Advanced: lighting, brightness, floor shadow, blur and darken for your own image, and model options: turn 90 degrees, stand upright, change size, centre. The cover image is also set here: the picture visitors see before the 3D loads. It is taken from your start view unless you upload your own. Add a short description for it, up to 140 characters, for people using screen readers.

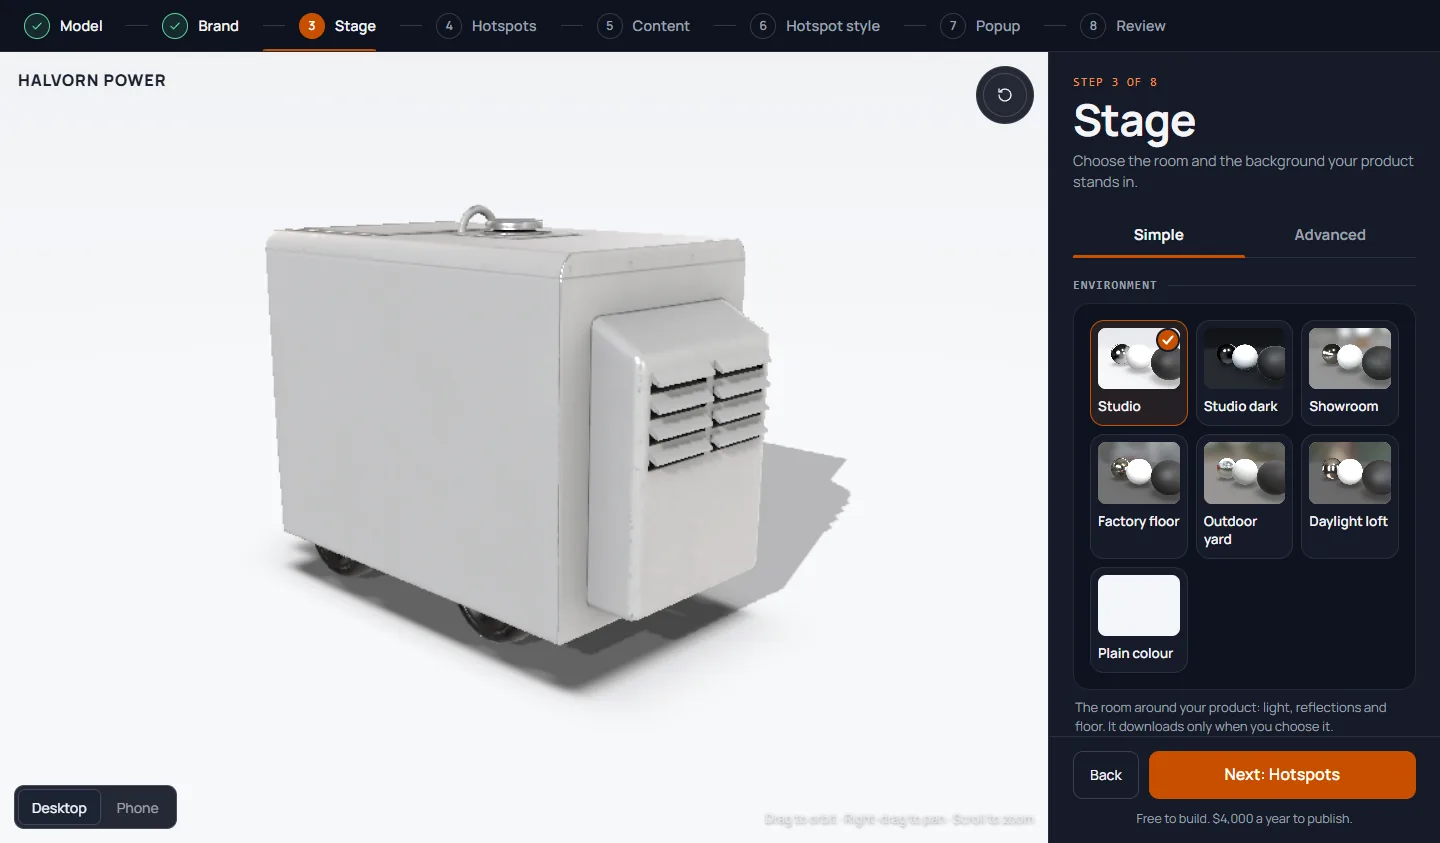
The Stage step with the room picker: Studio, Studio dark, Showroom, Factory floor, Outdoor yard, Daylight loft and Plain colour. Studio is chosen and the generator stands in it.
The Stage step, Advanced tab: lighting, model position and cover image controls.

Step 4: Hotspots

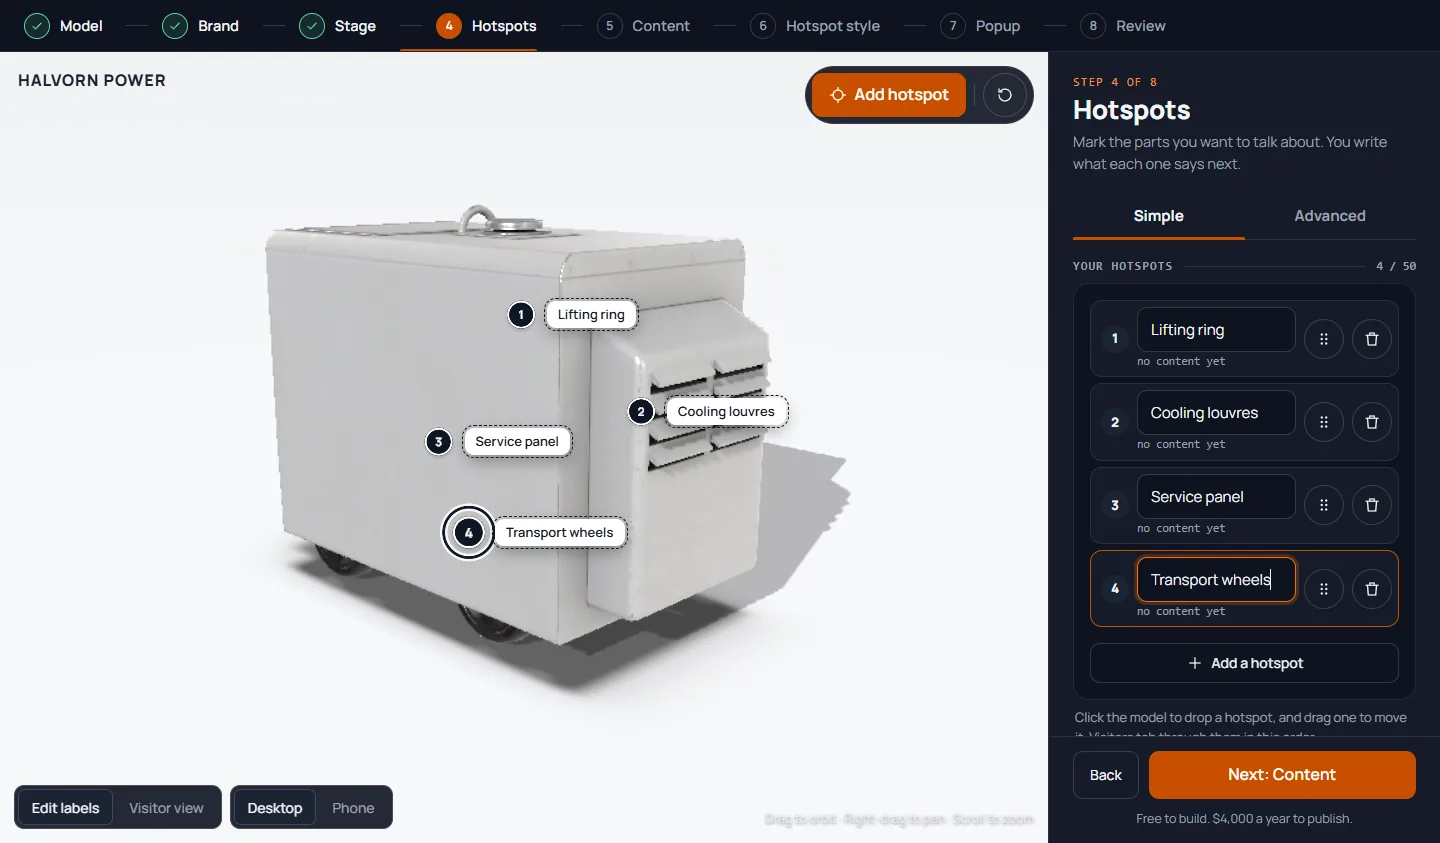
A hotspot is a point on the model that opens a panel with your content. Click the model to add one, drag it to move it, and use the list to rename, reorder or delete. You can add up to 50 per twin.

Advanced: save a camera view for each hotspot, so opening it flies the camera there, and copy the hotspot’s link code to use in your own page (see section 4).

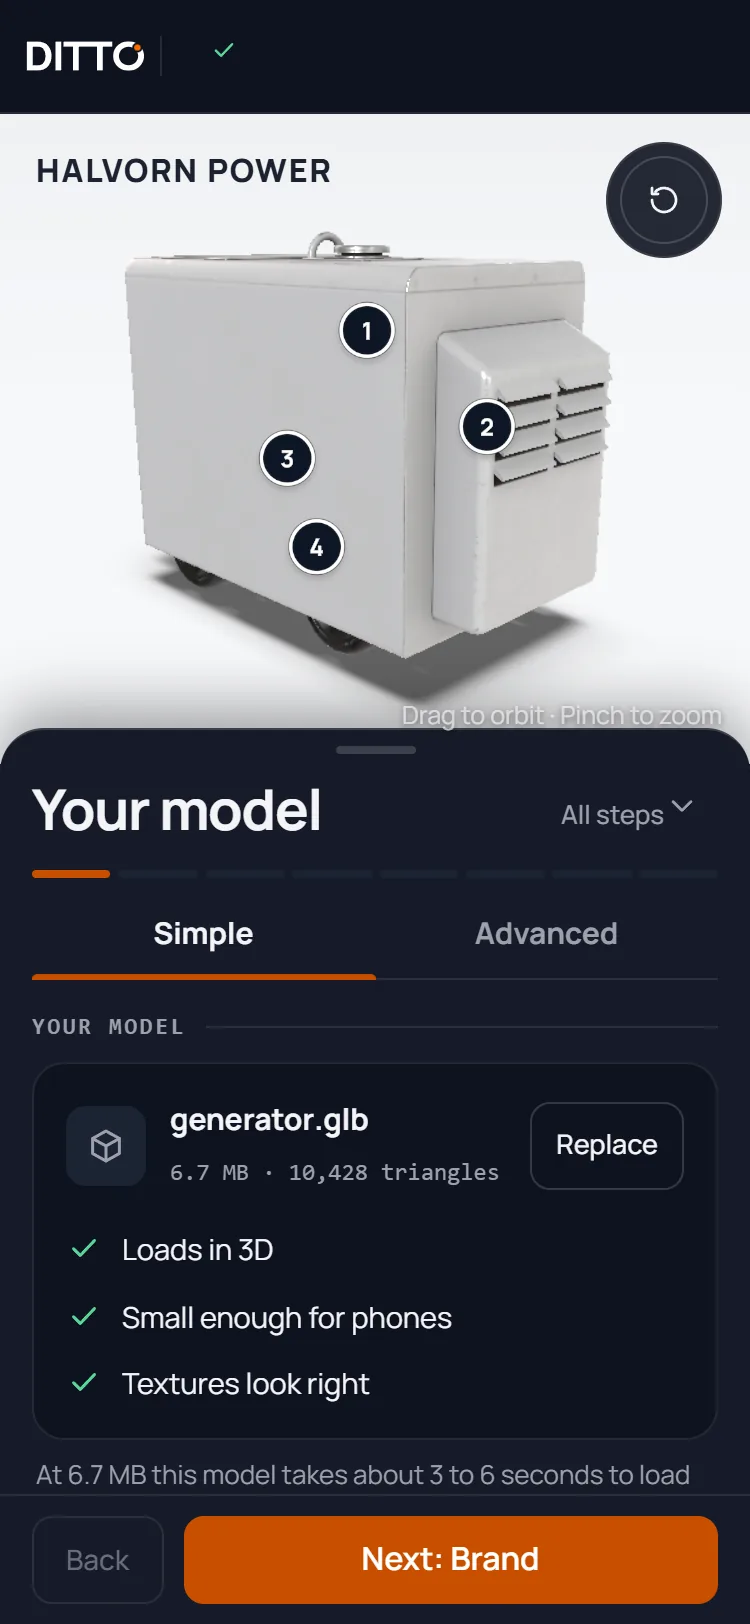
The Hotspots step: four numbered hotspots on the generator, each with its name as a label, and the hotspot list in the panel.
The Hotspots step in label editing mode, with a name label next to each of the four hotspots that can be dragged.
The Hotspots step, Advanced tab: the saved view and the link code for the selected hotspot.

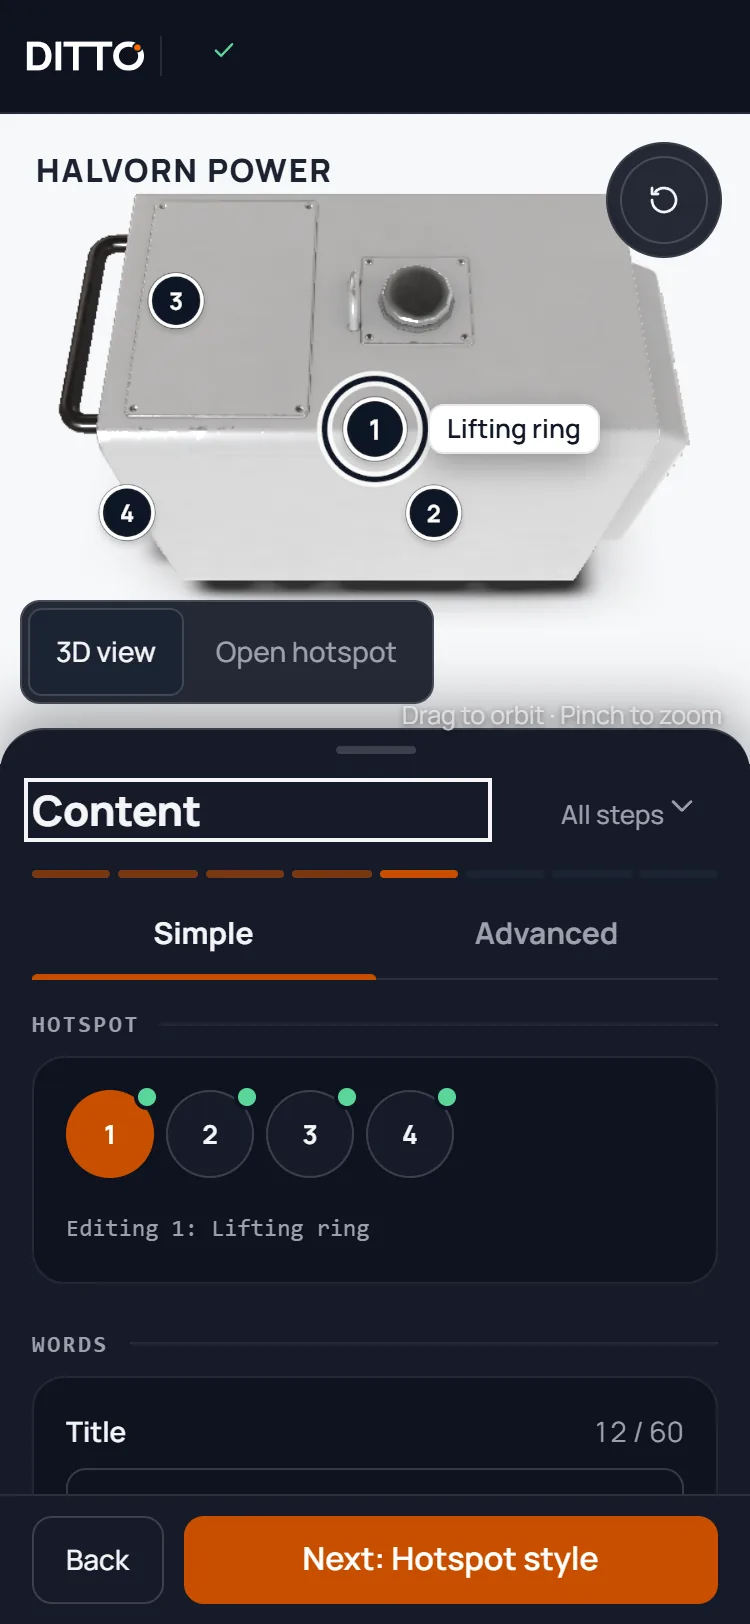
Step 5: Content

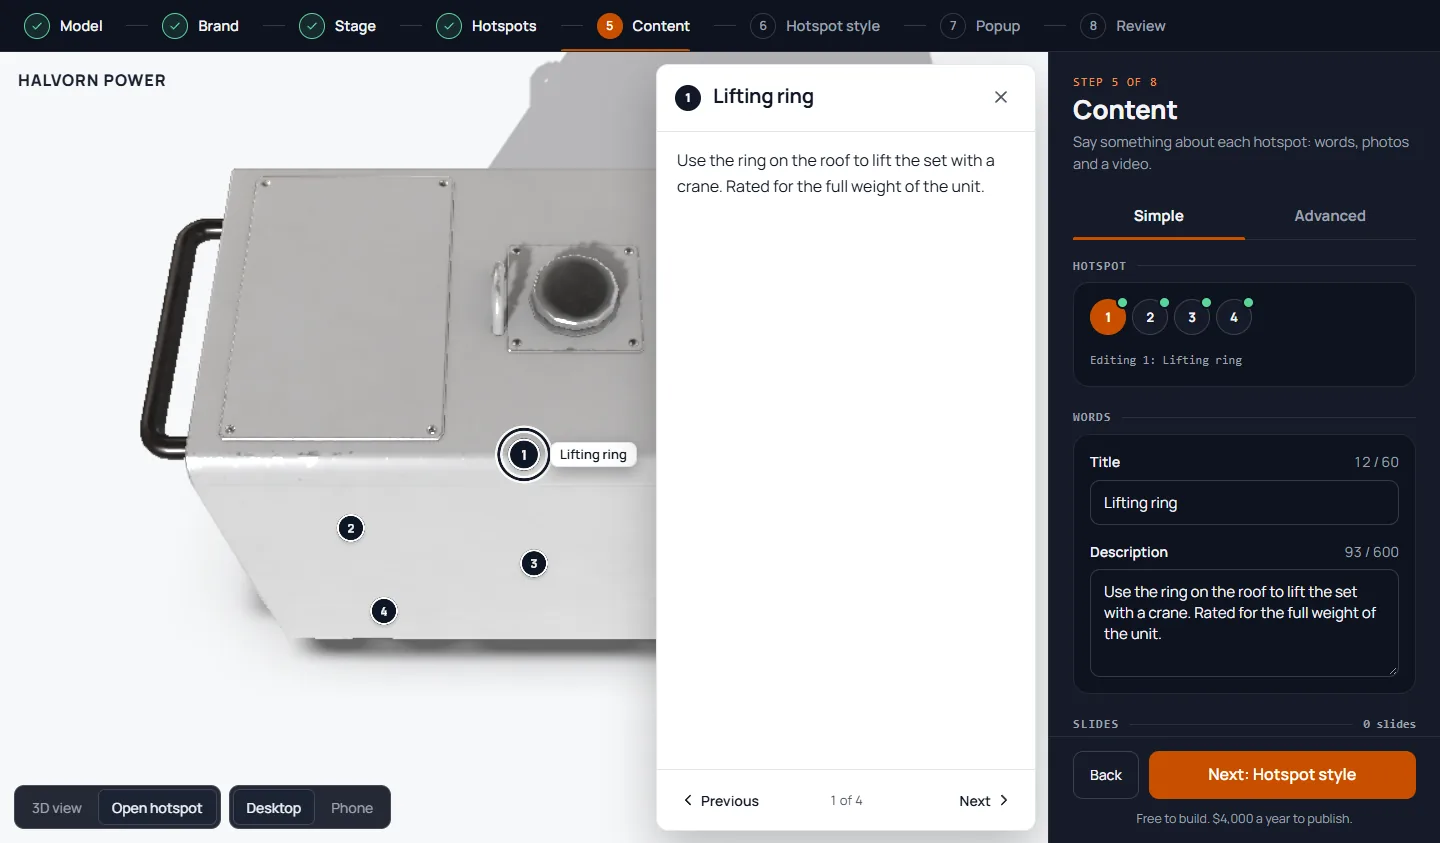
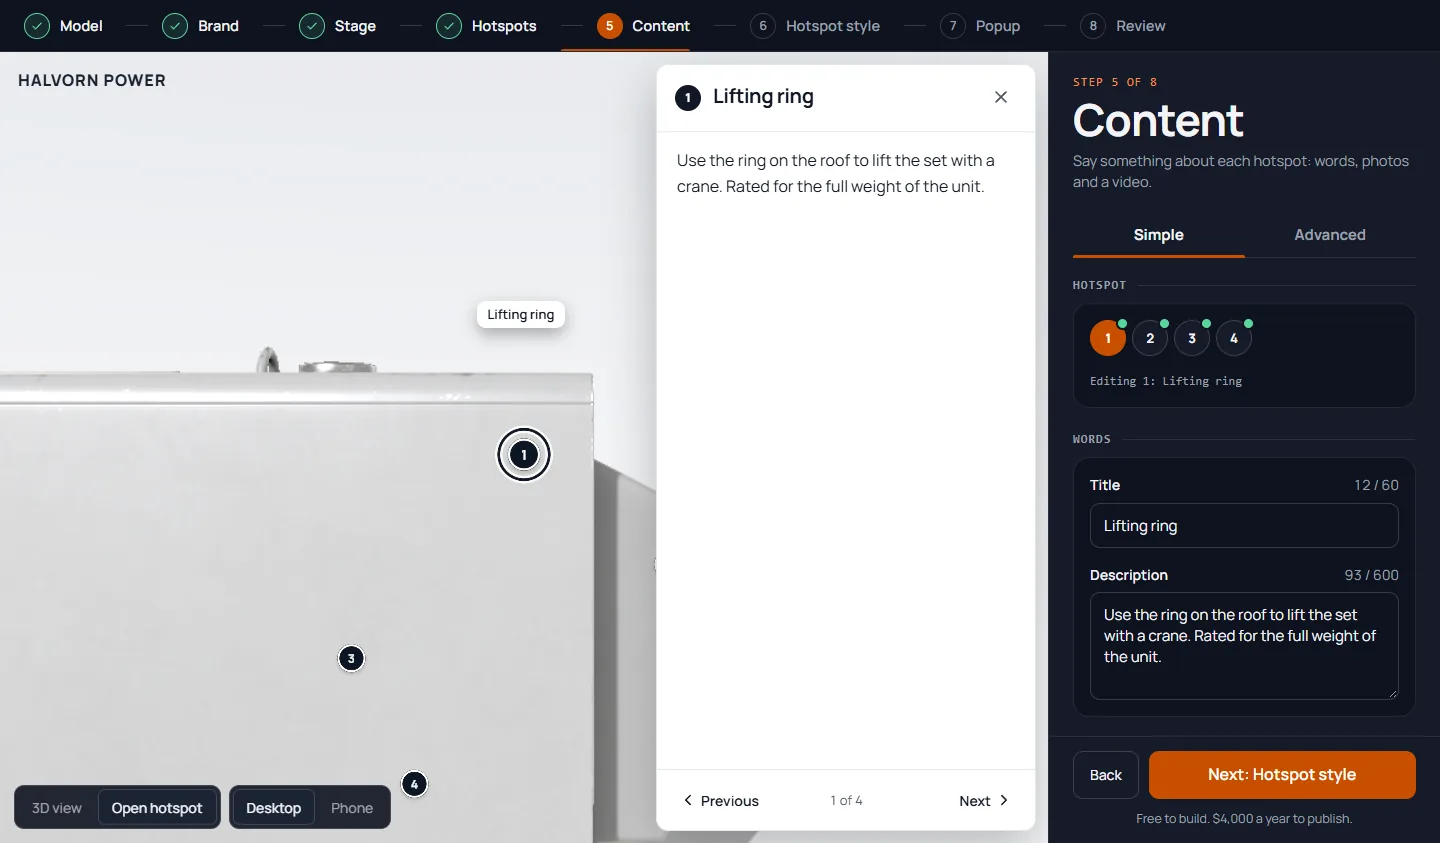
Pick a hotspot and fill in what visitors will read.

  • Title: up to 60 characters.
  • Description: up to 600 characters, plain text.
  • Photos: up to 10 per hotspot. Describe each photo on the Advanced tab before you publish.
  • Video: upload an MP4 or WebM up to 50 MB, with up to 10 uploaded videos per twin, or paste a YouTube or Vimeo link on the Advanced tab. A hotspot holds one video.
  • Advanced also takes a link (https only) and a PDF.

Uploaded videos play in place and make no requests to other sites. You can pick the poster frame with a slider or upload your own image.

The Content step with the hotspot chips 1 to 4, a title and a description, and the visitor's popup open next to the model.
The Content step, Advanced tab: the layout for this hotspot and media options.

Step 6: Hotspot style

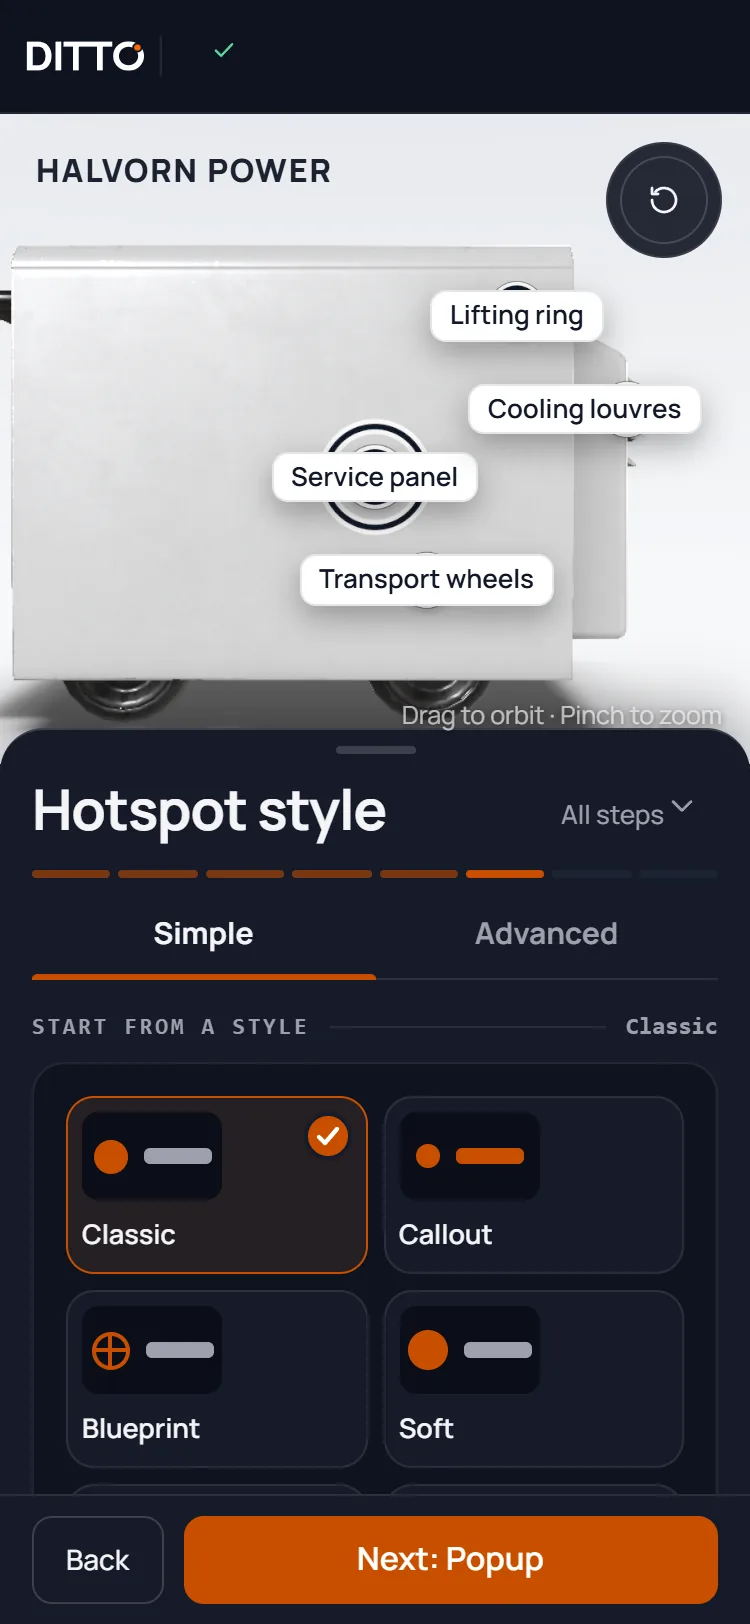
Choose how the markers look. Pick one of six styles, one of nine marker shapes, whether numbers show, and when labels appear: always, on hover or tap, or never.

To move a label, drag it in the 3D view. Labels stay inside the frame, and a small button on a moved label puts it back. “Visitor view” shows exactly what visitors will see. Advanced covers size, color, pulse, label style and line thickness.

The Hotspot style step: style presets, marker shapes and label modes, with the generator and its hotspots in the view.
The Hotspot style step, Advanced tab: marker size and colour, label style and size, and lines.

Step 7: Popup

Choose how a hotspot’s content opens: side panel, bottom sheet, a card next to the hotspot, a centred card, or full screen. Then choose the header style and how photos are laid out. Advanced sets the side, width, dimming and what happens on phones (full screen by default). Use “Phone” in the preview to check the small-screen result.

The Popup step with layout choices (side panel, bottom sheet, card, centred, full screen) and the open popup next to the model.
The Popup step, Advanced tab: width, position and the layout used on phones.
The visitor's view: the generator in 3D with numbered hotspots and one hotspot open in a popup showing its title and text.

Step 8: Review

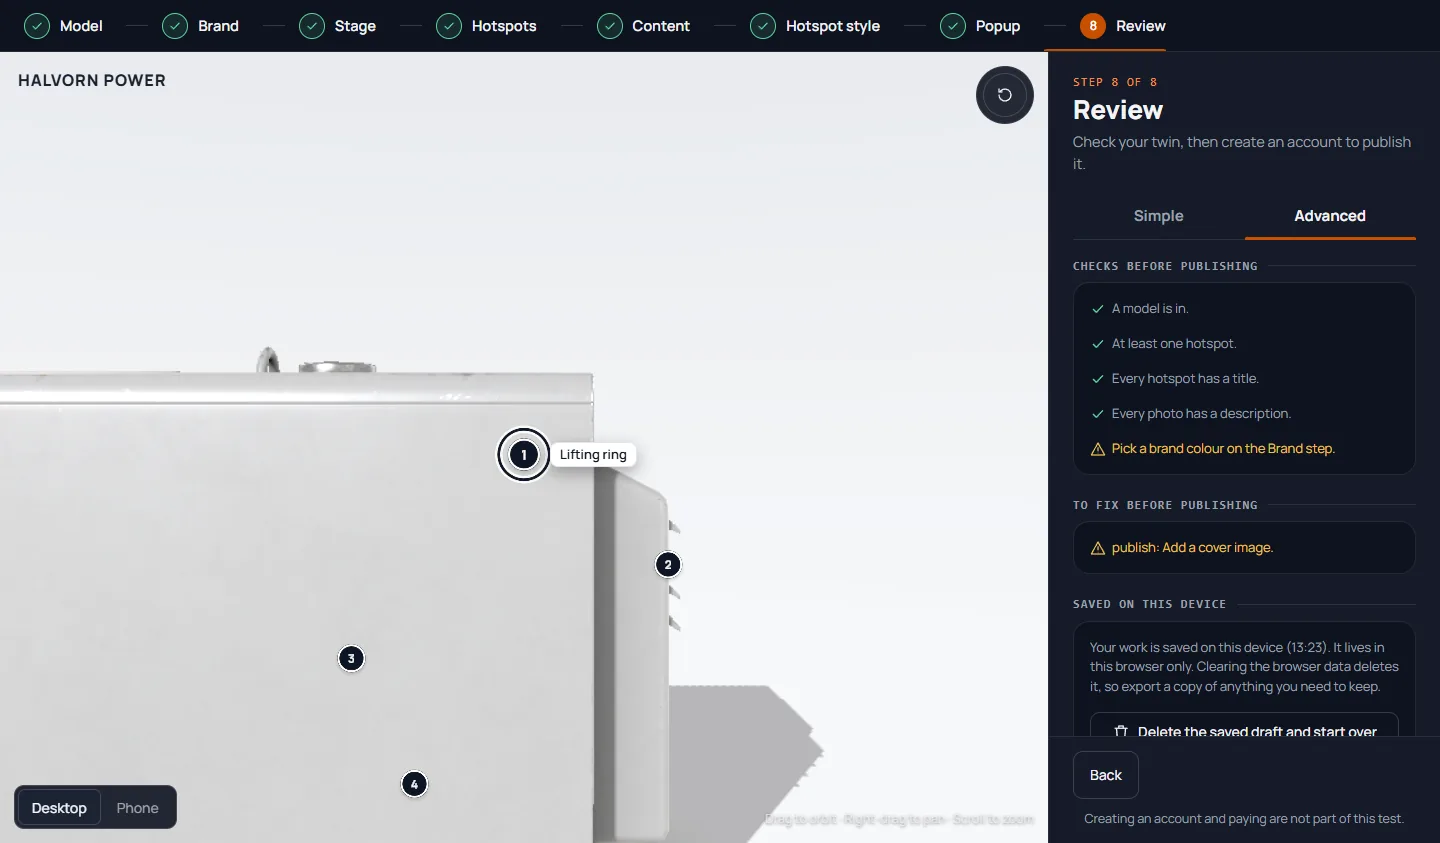
Review lists every choice with an Edit link beside each one. Check the cover image, then press “Create an account to publish”. Advanced shows the checks that must pass before publishing, and the price.

The Review step: a summary of the twin with an Edit link on each line.
The Review step, Advanced tab: checks before publishing and the price, $4,000 a year or $1,150 every 3 months.

Publish and get your embed code

  1. Create an account with your email and a password, or sign in with Google. Confirm your email address from the message we send.
  2. Choose how to pay: $4,000 a year, or $1,150 every 3 months ($4,600 a year). Yearly saves $600. Tax is added where it applies. You see the price, the billing period, the renewal date and how to cancel before you pay.
  3. Pay by card on Stripe’s secure checkout page. We never see your card number.
  4. As soon as the payment is confirmed, your twin is live and the embed code appears. We also email it to you.

If your card is declined, your twin is saved as a draft and you can come back and pay later. Company cards often have a per-purchase limit. Ask your card administrator to raise it, or choose the every 3 months option so each charge is smaller.

Need to pay another way, such as a purchase order? Write to us (see Get help).

The publish panel, first screen: create an account with Google or an email and password.
The publish panel, payment screen: choose Yearly $4,000 or Every 3 months $1,150, with what renews and how to cancel.
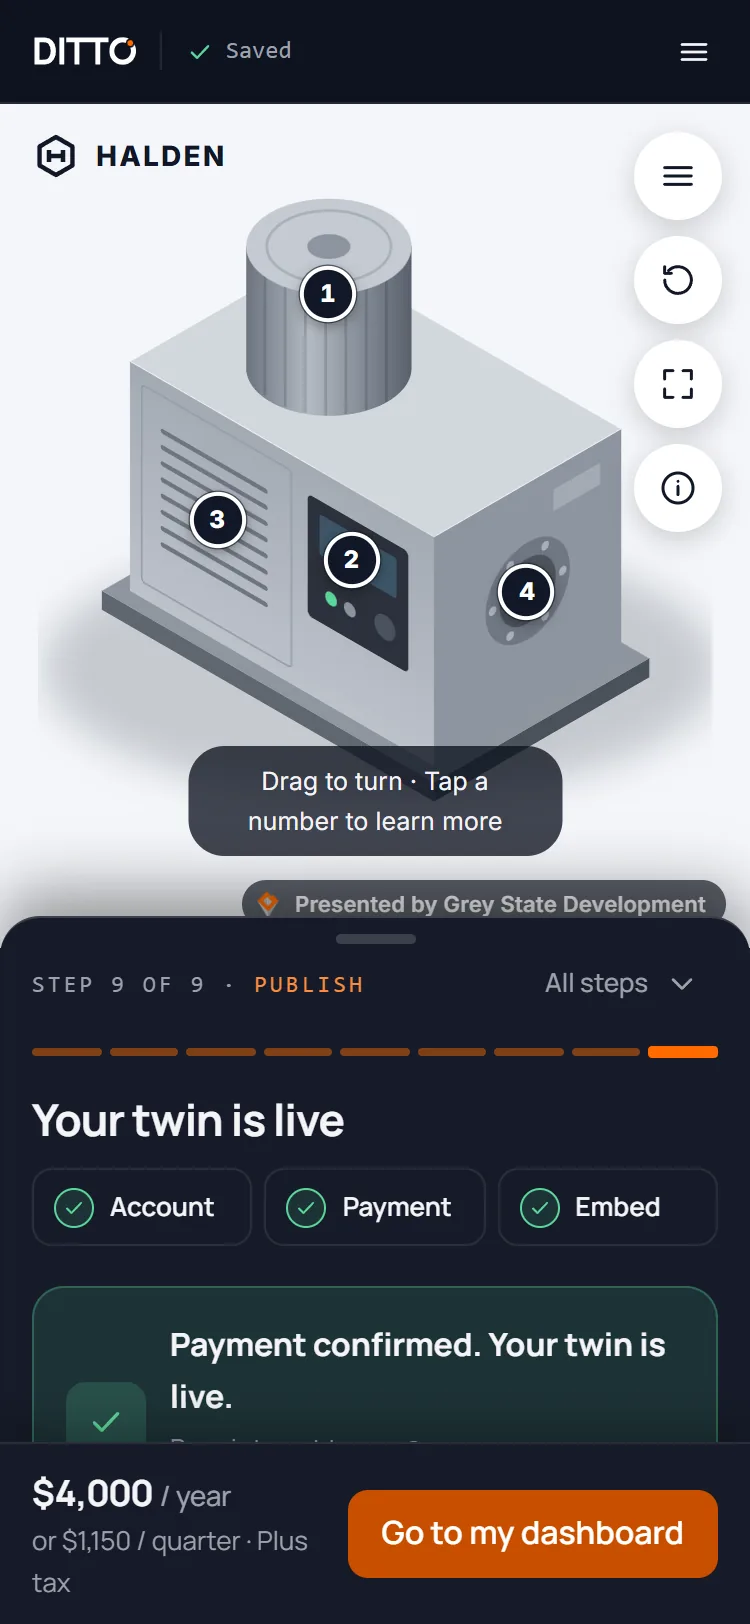
The publish panel after payment: Your twin is live, and the list of sites where it may appear.

Put the twin on your website

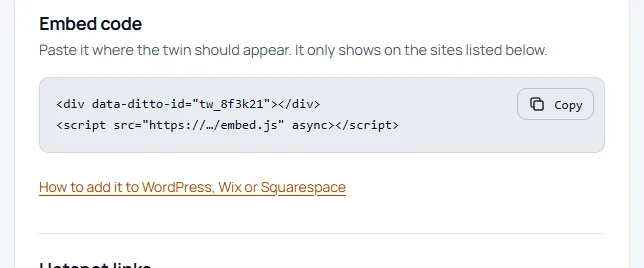
Your embed code has two parts: a short <div> where the twin should appear, and one <script> tag. Paste the div where you want the twin. Paste the script tag once anywhere on the page, even if you show several twins there.

  • WordPress: add a Custom HTML block where the twin should appear and paste both parts in it.
  • Wix: add an Embed code element, choose Custom code, and paste both parts.
  • Squarespace: add a Code block and paste both parts. Code blocks need a plan that allows them.
  • Plain HTML: paste the div in your page and the script tag before the closing body tag.
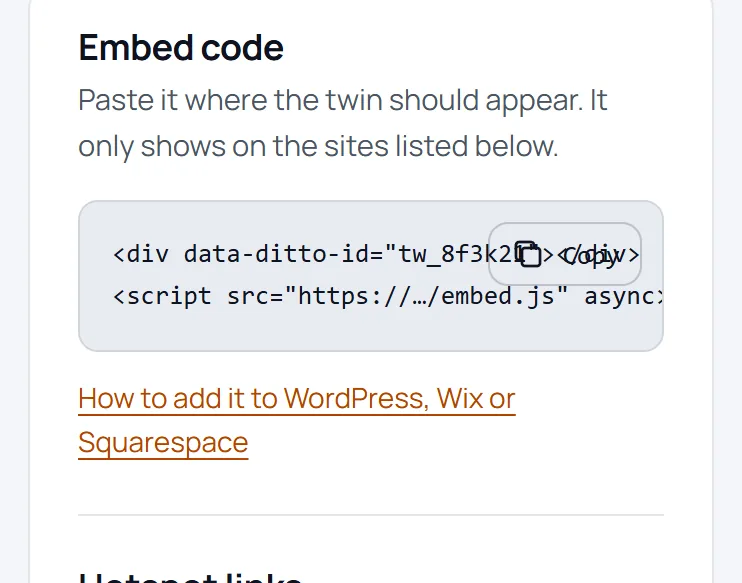
The Embed code card on the twin page: a two-line code snippet with a Copy button and a link to the WordPress, Wix and Squarespace guide.

Good to know

  • The twin is as wide as the space you put it in. Use data-ditto-ratio (for example 4:3 or 1:1) or data-ditto-height to change its shape.
  • Visitors first see your cover image. The 3D loads when they tap it or scroll to it.
  • For a “View in 3D” button, put the div inside a <dialog> element with data-ditto-load="visible" and let the button open the dialog. Nothing loads until it opens.
  • To link words on your page to a hotspot, use <a href="#" data-ditto-focus="HOTSPOT_ID">intake valve</a> with the hotspot’s link code. Clicking loads the twin if needed and flies to that hotspot.
  • If your site builder removes script tags, use the plain iframe from the embed screen instead. It shows the cover and loads the 3D on click by itself.
  • If your site uses a Content Security Policy, allow https://firebasestorage.googleapis.com under script-src and frame-src, and the DITTO API host under connect-src. Your web team will know what this means.
  • On phones, full screen fills the window. If a page effect (a CSS transform, filter, perspective or contain rule) wraps the twin, the twin fills that area instead. Move the twin outside the effect.

Allowed domains

A twin only shows on websites you list. This stops other sites from using your twin.

  1. Open the twin in your dashboard.
  2. Under Allowed domains, add the address of each site, for example example.com. Add the www. version too if your site uses it. You can list up to 10.
  3. Save. The first set takes effect at once. Later changes need a confirmation: we email you a link, and the change applies when you open it. The link can be used once and works for 24 hours.

On any other site, the twin shows “This 3D view is not available on this site”. If you see this on your own site, check the spelling and the www..

The Allowed sites card: a list of sites where the twin may appear, a field to add one and an Add button.

Password protection

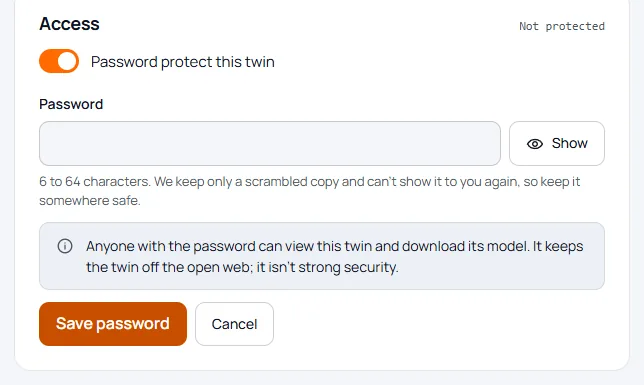
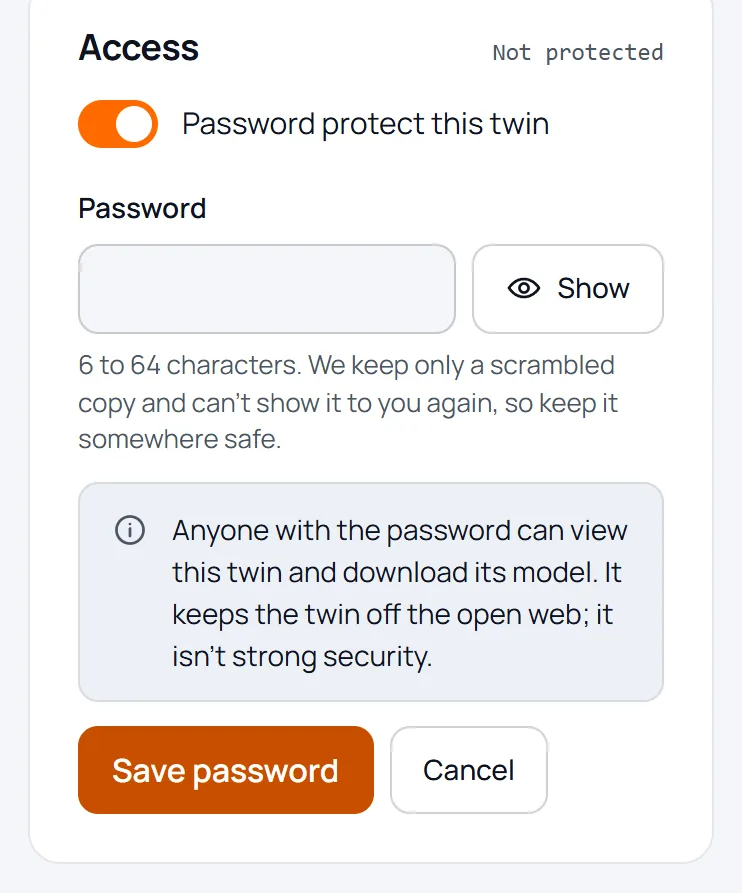
If you want only some people to see a twin, turn on Password protect this twin in the twin’s settings and set a password of 6 to 64 characters. Visitors tap the cover, then enter the password before the 3D loads. They are asked again each time the page is reloaded.

This keeps a twin off the open web. It is one shared password, not strong access control. Anyone who has the password can view the twin and download its model. Do not use it for anything confidential.

Forgot the password? Set a new one in the same place. If you lose access to your account, write to us.

The Access card while setting a password: a password field with Show, and Save password and Cancel buttons.
The Access card with password protection turned on, showing when the password was last changed.

Your dashboard

Sign in to the DITTO portal at portal.greystatedevelopment.com. The first screen lists your twins with a cover image, a status and a short line about what is next.

Statuses

  • Draft: built but not published. No embed code yet.
  • Live: visitors can see it. The card shows the renewal date.
  • Live, ending: you canceled. It stays live until the end of the period you paid for.
  • Paused: the 3D view is off and visitors see the cover image. The card says why: payment overdue, the monthly load limit reached, or a takedown by Grey State.
  • Canceled: offline. We keep your files for 90 days in case you come back.

On a twin you can

  • Edit it. Edits save as a draft. Press Publish changes to make them live. Visitors never see half-finished edits.
  • Copy the embed code, change allowed domains, and set a password.
  • Rename it, duplicate it, or delete it. Deleting asks you to confirm by email.
  • See how many 3D loads it has used this month, and open its Analytics tab (see Your analytics).

3D loads. Each time a visitor opens the 3D view counts as one load, and one visitor’s repeat visits count at most five times a day. A twin includes 25,000 loads a month. We email you at 80%. At 25,000 the 3D view pauses until the 1st of the next month, visitors see the cover image, then it comes back on its own. If you need more, write to us.

Account. Change your email or password, open your billing page, or delete your account. Deleting your account removes your models and media, cancels your subscriptions and asks you to confirm by email.

The portal Dashboard in light mode: Welcome back, a payment warning and the DITTO card with twin counts.
The list of twins in the portal with their status.
A twin's page in the portal: its name and status, the Embed code card, hotspot links and the Plan card.
The Account page: sign-in details, this device and Delete account.

Your analytics

Every twin has an Analytics tab in the portal. It is included in your plan at no extra charge.

Pick a date range: 7, 30 or 90 days, the month so far, or your own range of up to a year. You see:

  • Views: how many times your twin’s cover appeared on a page of one of your allowed sites. Each page load counts once. Views on other sites are not counted.
  • 3D loads: how many times a visitor started the 3D view, with the share that loaded successfully.
  • Hotspot opens: how often each hotspot was opened, with the most opened first.
  • Document and link opens: how often visitors opened a PDF or followed a link from a hotspot.
  • Clicks on calls to action: how often visitors pressed the twin’s call-to-action button. Links followed and files opened from hotspots are counted as link opens and document opens, not here.
  • Sites: which of your allowed domains the views came from.
  • Devices: phone, tablet or desktop, with the typical load time for each.
  • A daily chart, and a meter for the month’s 3D load allowance.

Each figure is compared with the period before it. Export the numbers as a CSV file to open in a spreadsheet.

These are counts only. DITTO sets no cookies and loads no tracking scripts on your site, and it does not record who a visitor is, their IP address or what they did one by one. You see totals for your own twins and nothing about anyone else’s.

Visitor numbers update within seconds. They are sent from the visitor’s browser, so a visitor whose browser blocks them is missed and every figure here can run slightly low.

Your monthly allowance is counted separately, on our server, and it is the number we bill against. It updates every 15 minutes and counts repeat visits from the same visitor at most five times a day, so it can read lower than the 3D loads in your analytics.

Billing

Each twin is its own subscription, paid by card through Stripe.

  • Yearly: $4,000 a year. We email you 30 days before it renews.
  • Every 3 months: $1,150, which comes to $4,600 a year. We email you 7 days before each renewal.
  • Switch between the two from the billing page. The change applies at your next renewal, with no extra charge or credit in between.
  • Update your card, download invoices and cancel from the billing page. Cancelling takes as many clicks as subscribing did. Your twin stays live until the end of the period you paid for.
  • Refunds: if you ask within 14 days of any charge, including a renewal, we refund it in full.
  • If a payment fails, we retry the charge for 14 days and the twin stays live while you update your card. After 14 days the twin pauses until the card is fixed.

Prices do not include tax. Applicable tax is added at checkout.

The Billing page: subscriptions, payment method and invoices.

Get help

Write to [email protected]. We answer within one business day. If your question is about a twin, include its name or the address of the page it is on.

Want a 30-minute call to get started? Ask for one in your first email.

Need variants of a product, an exploded view, a kiosk, or a full briefing room? That is custom work. Talk to us.

Scroll to Top